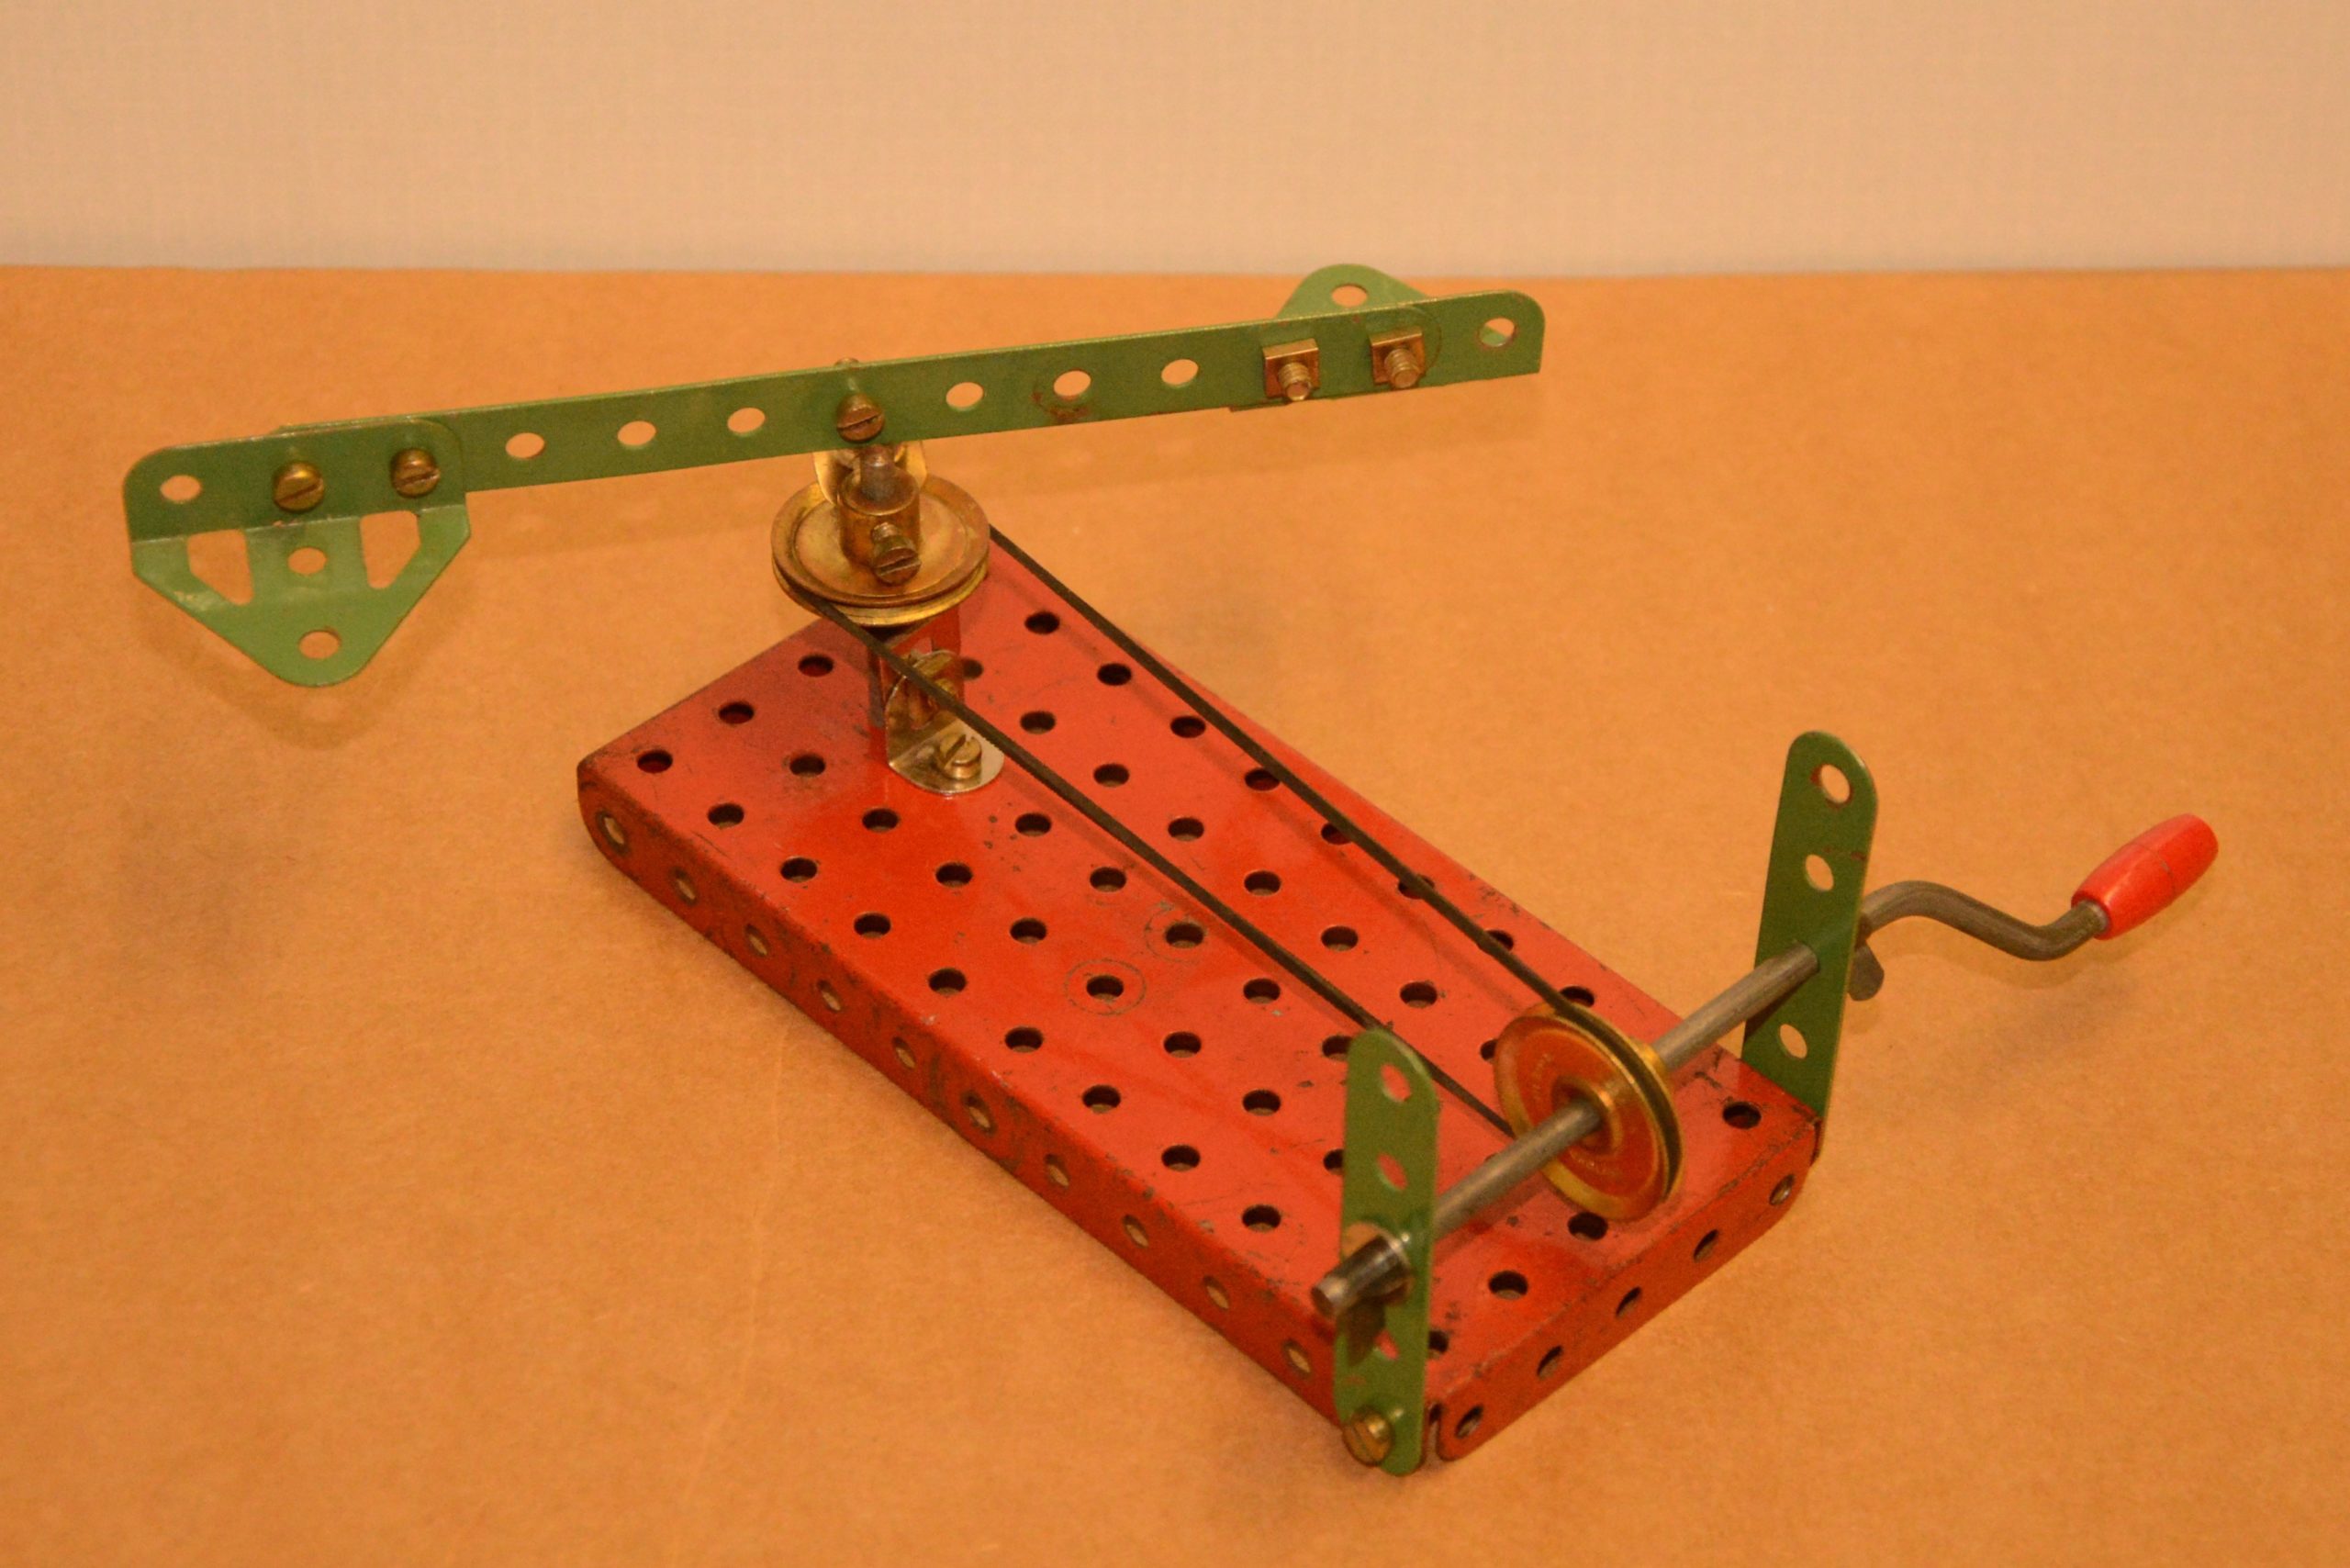
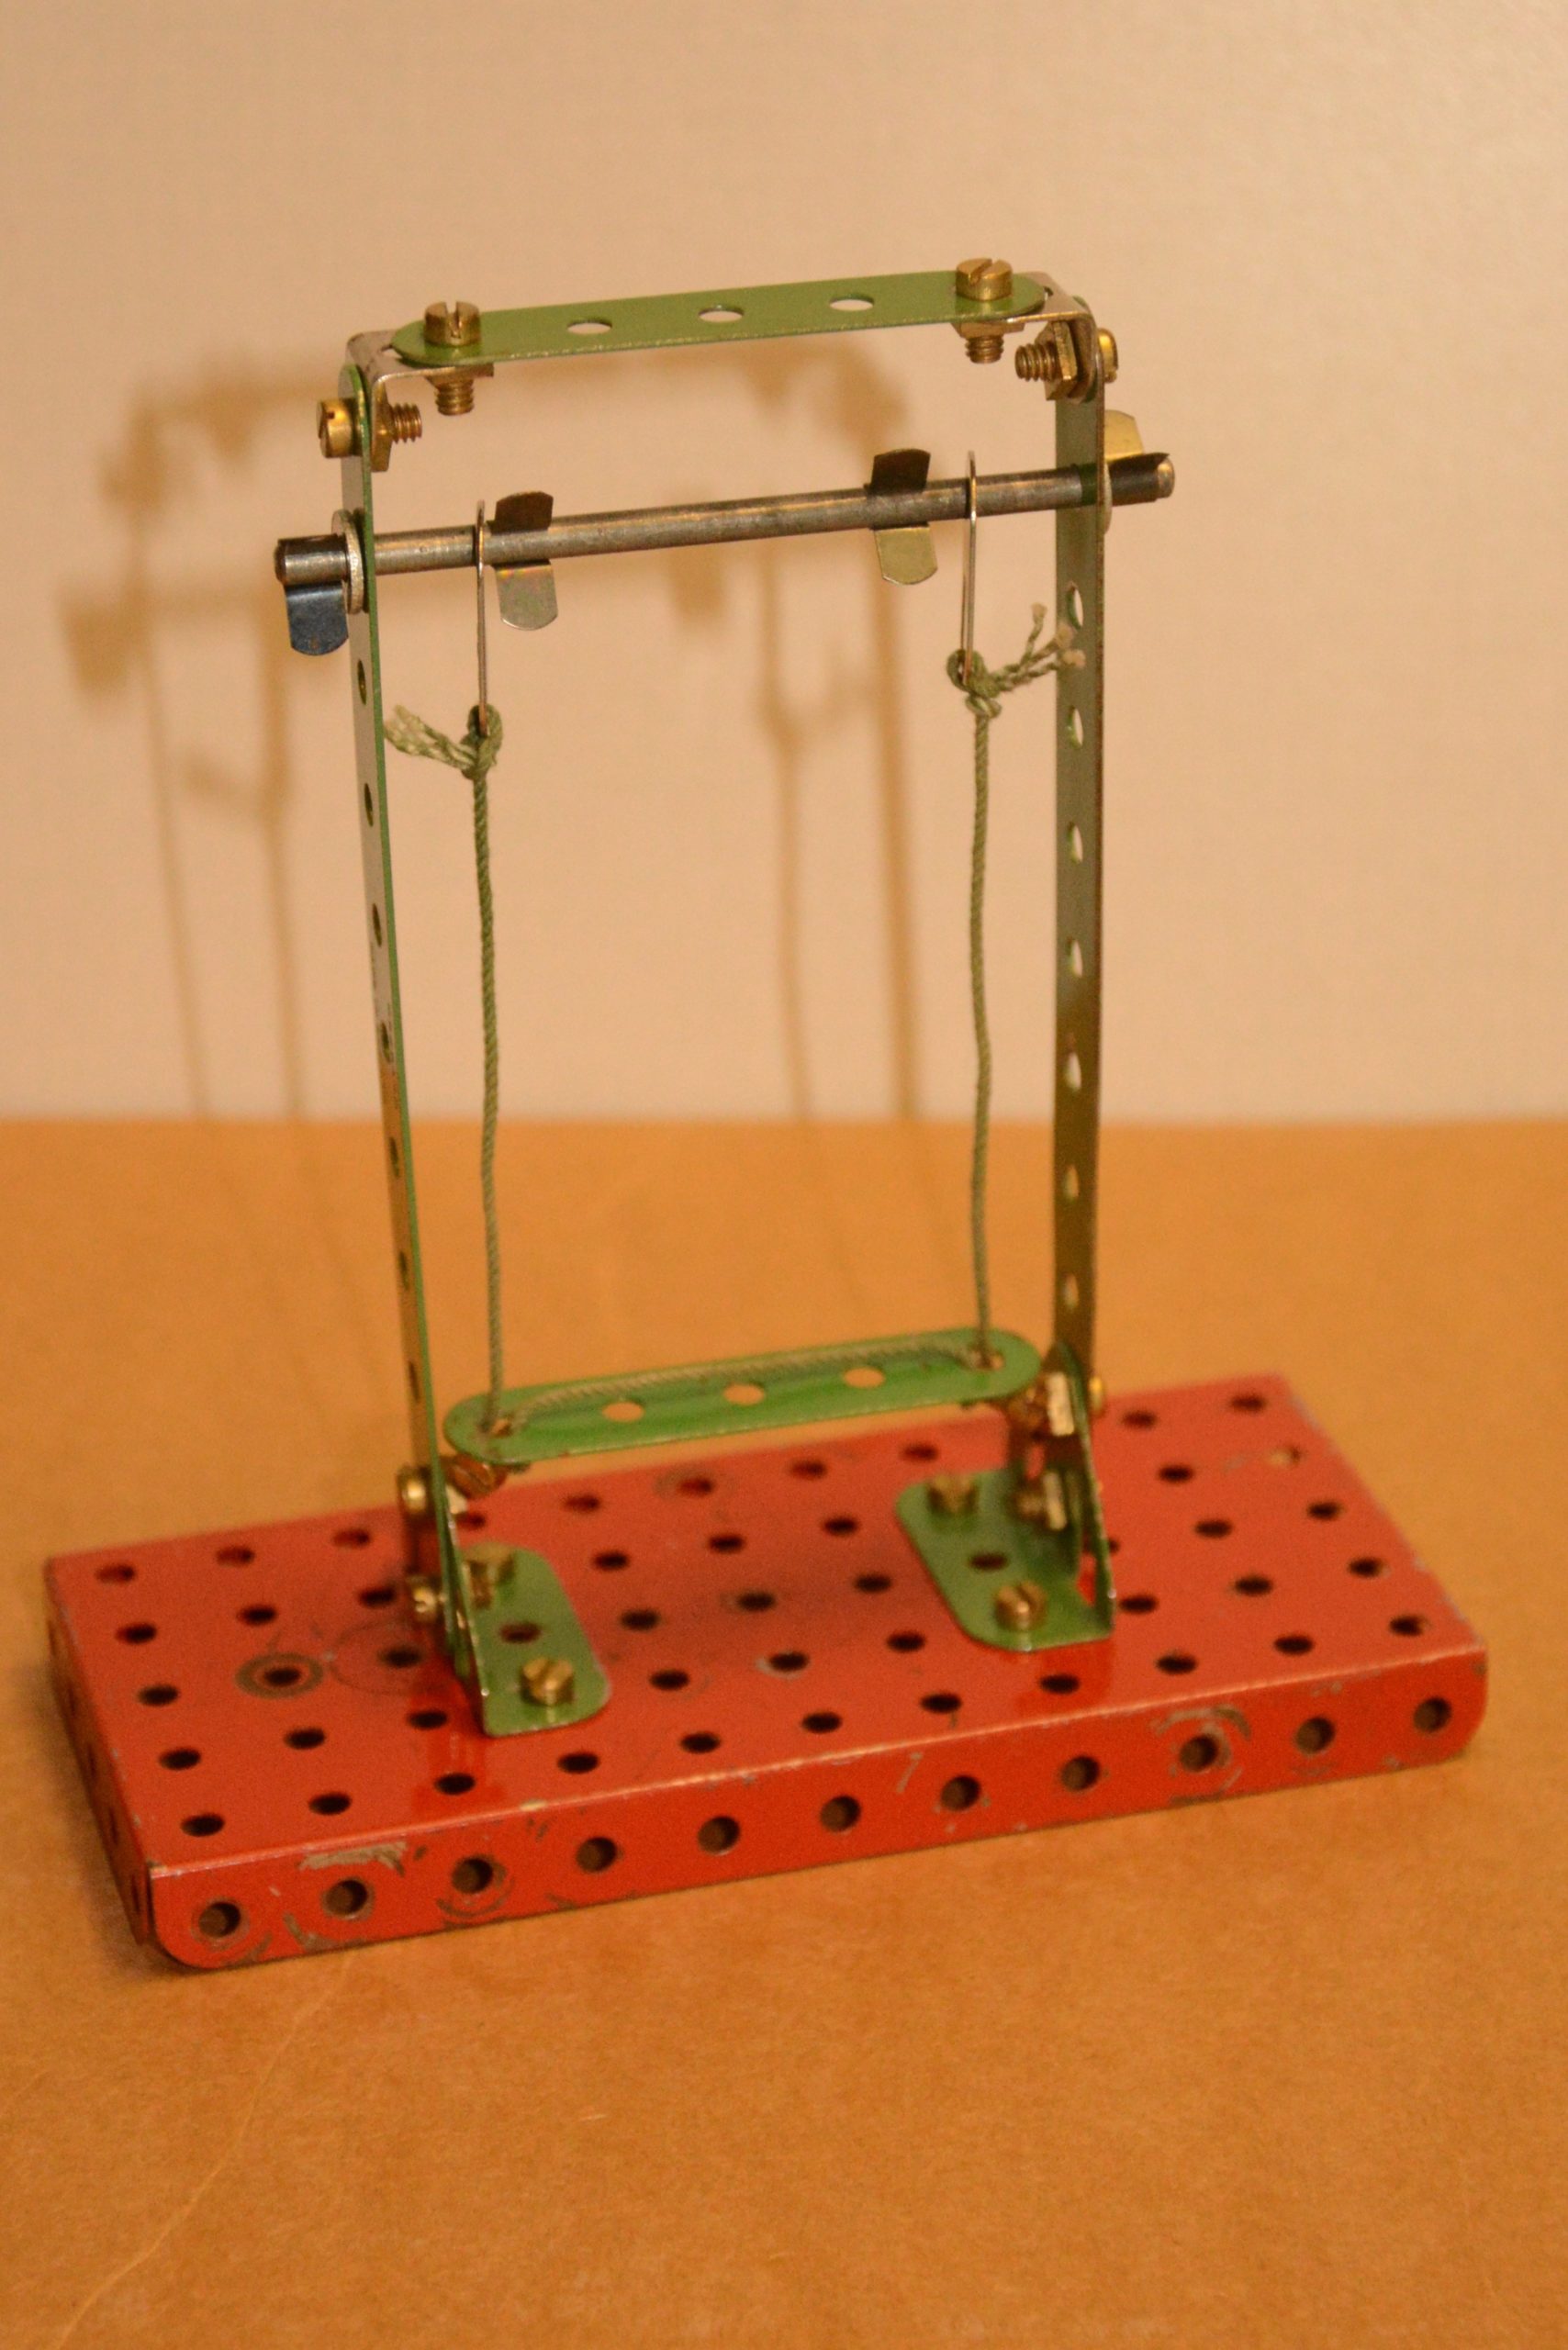
Chris Fearnley is showing his Giant Block Setter Crane.
You can read and see more of the build on Chris Fearnley's Page.
Andrew Jefferis:
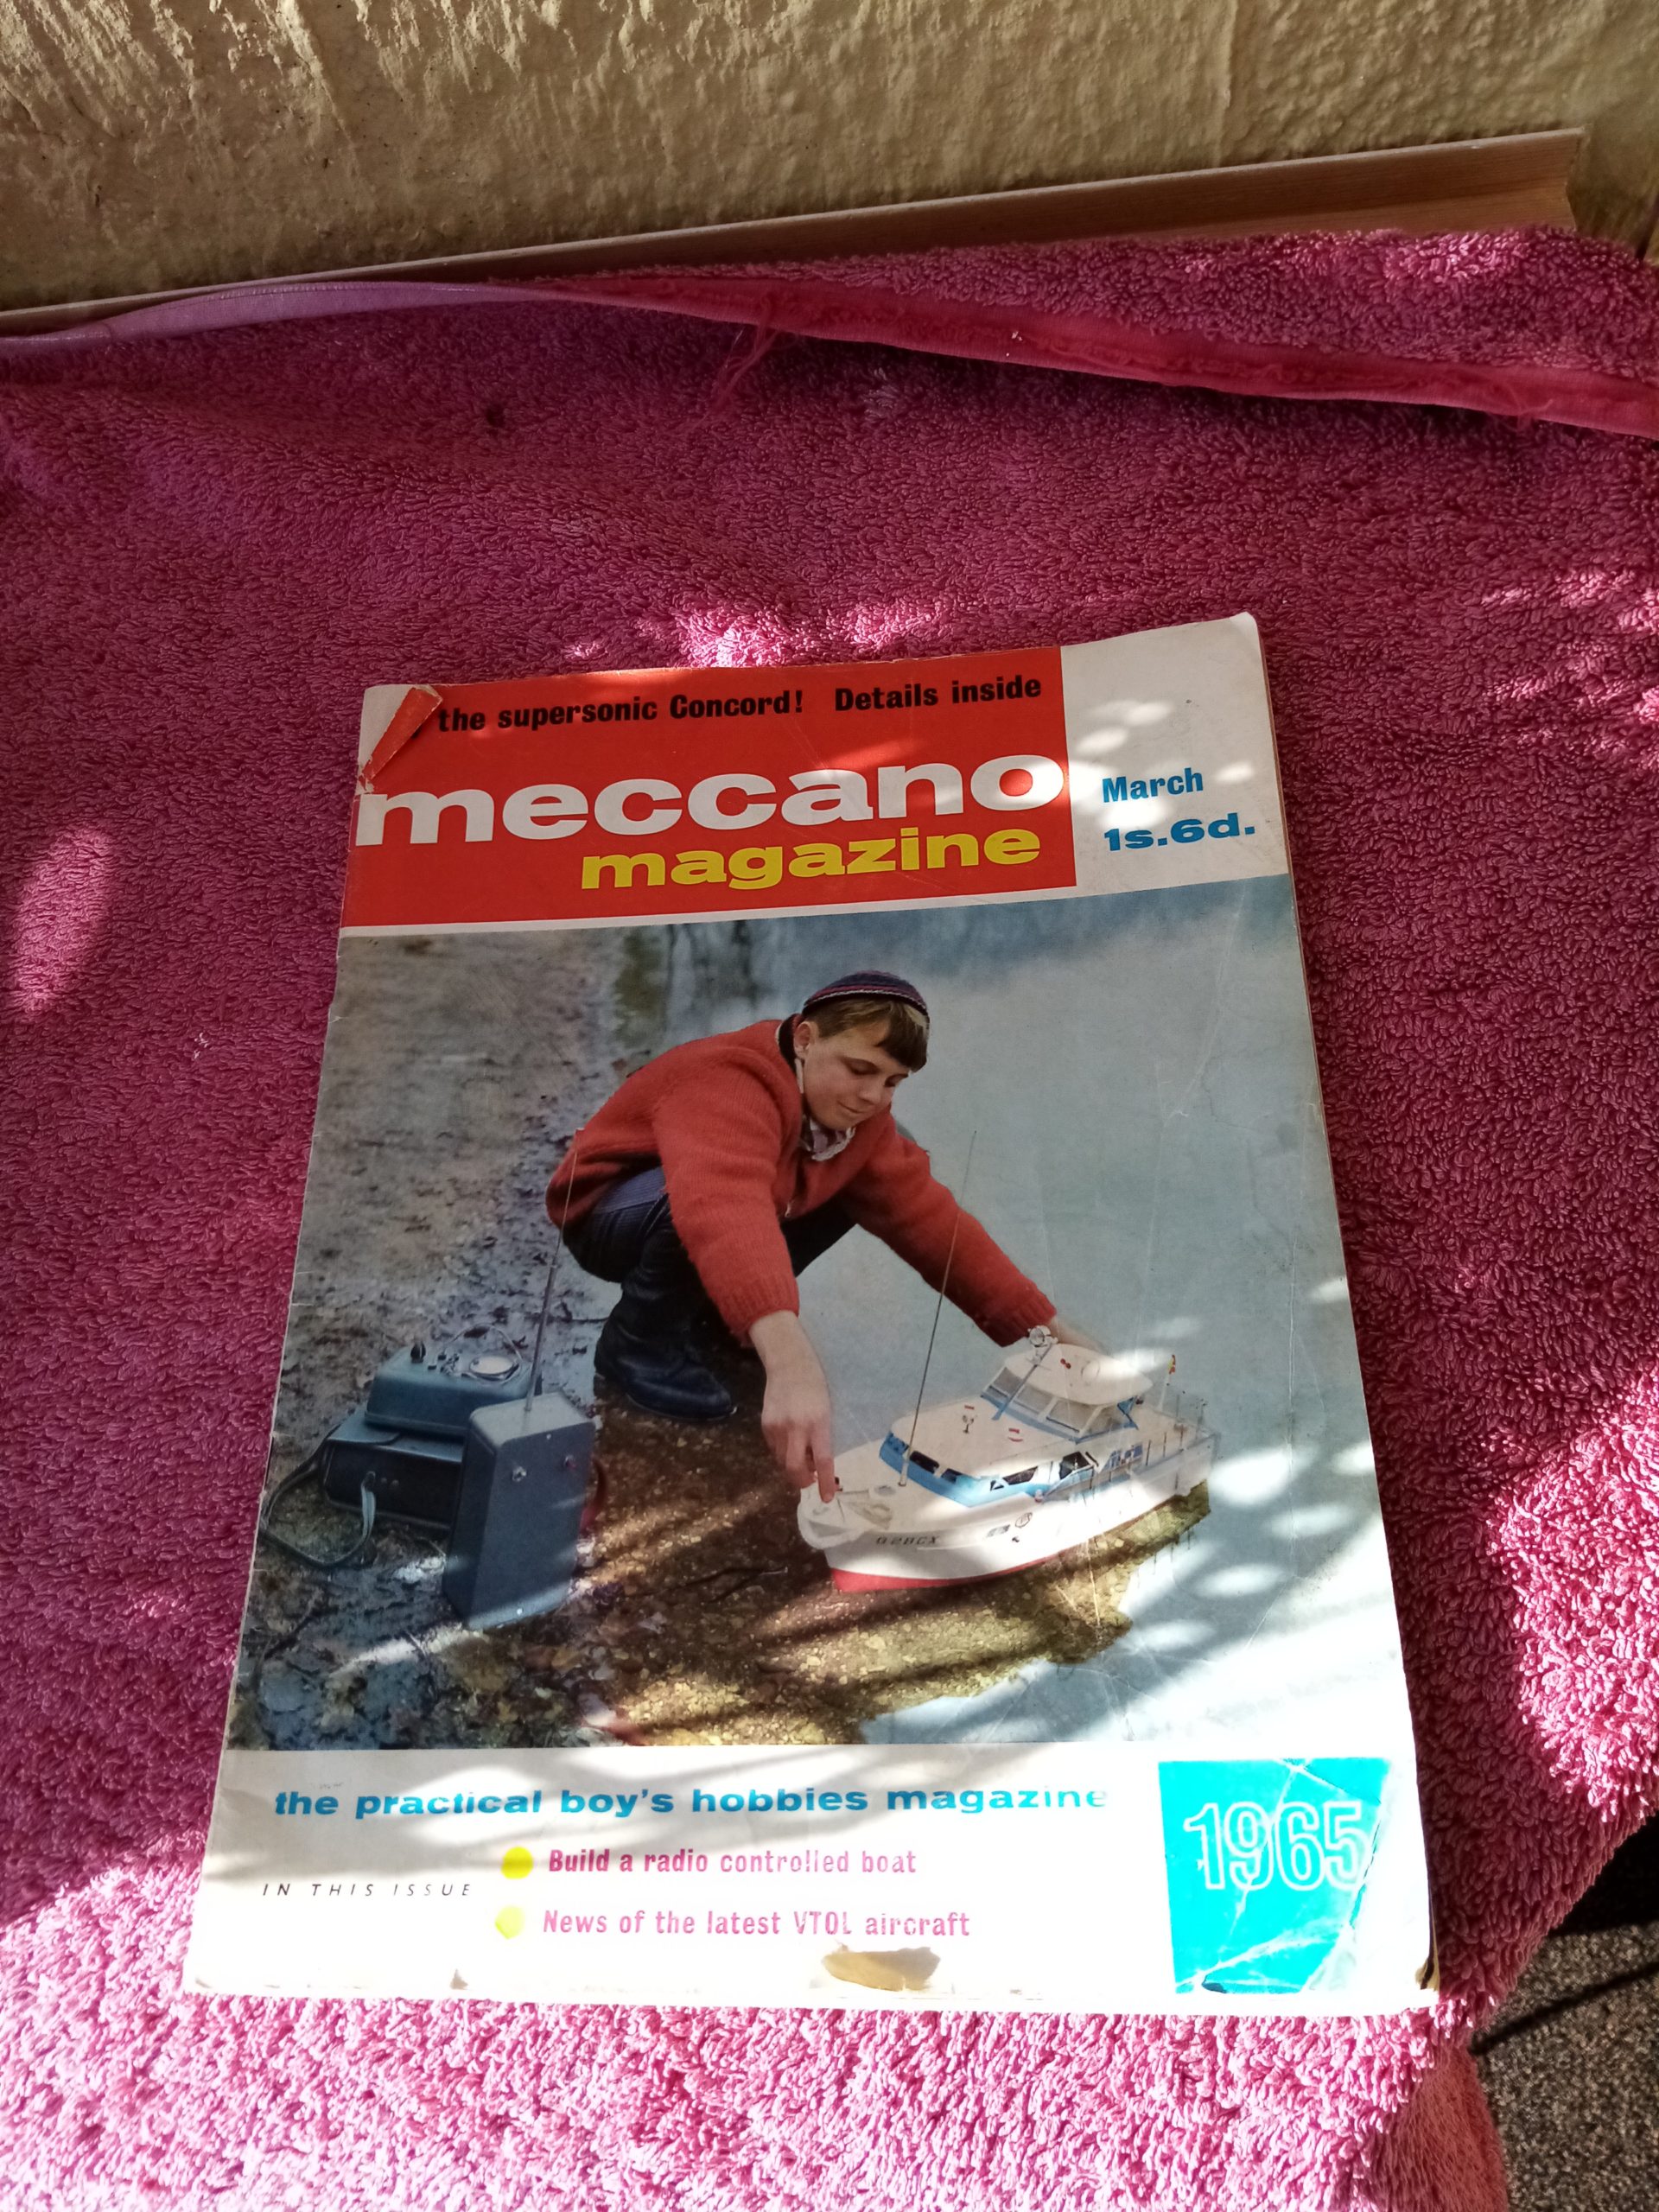
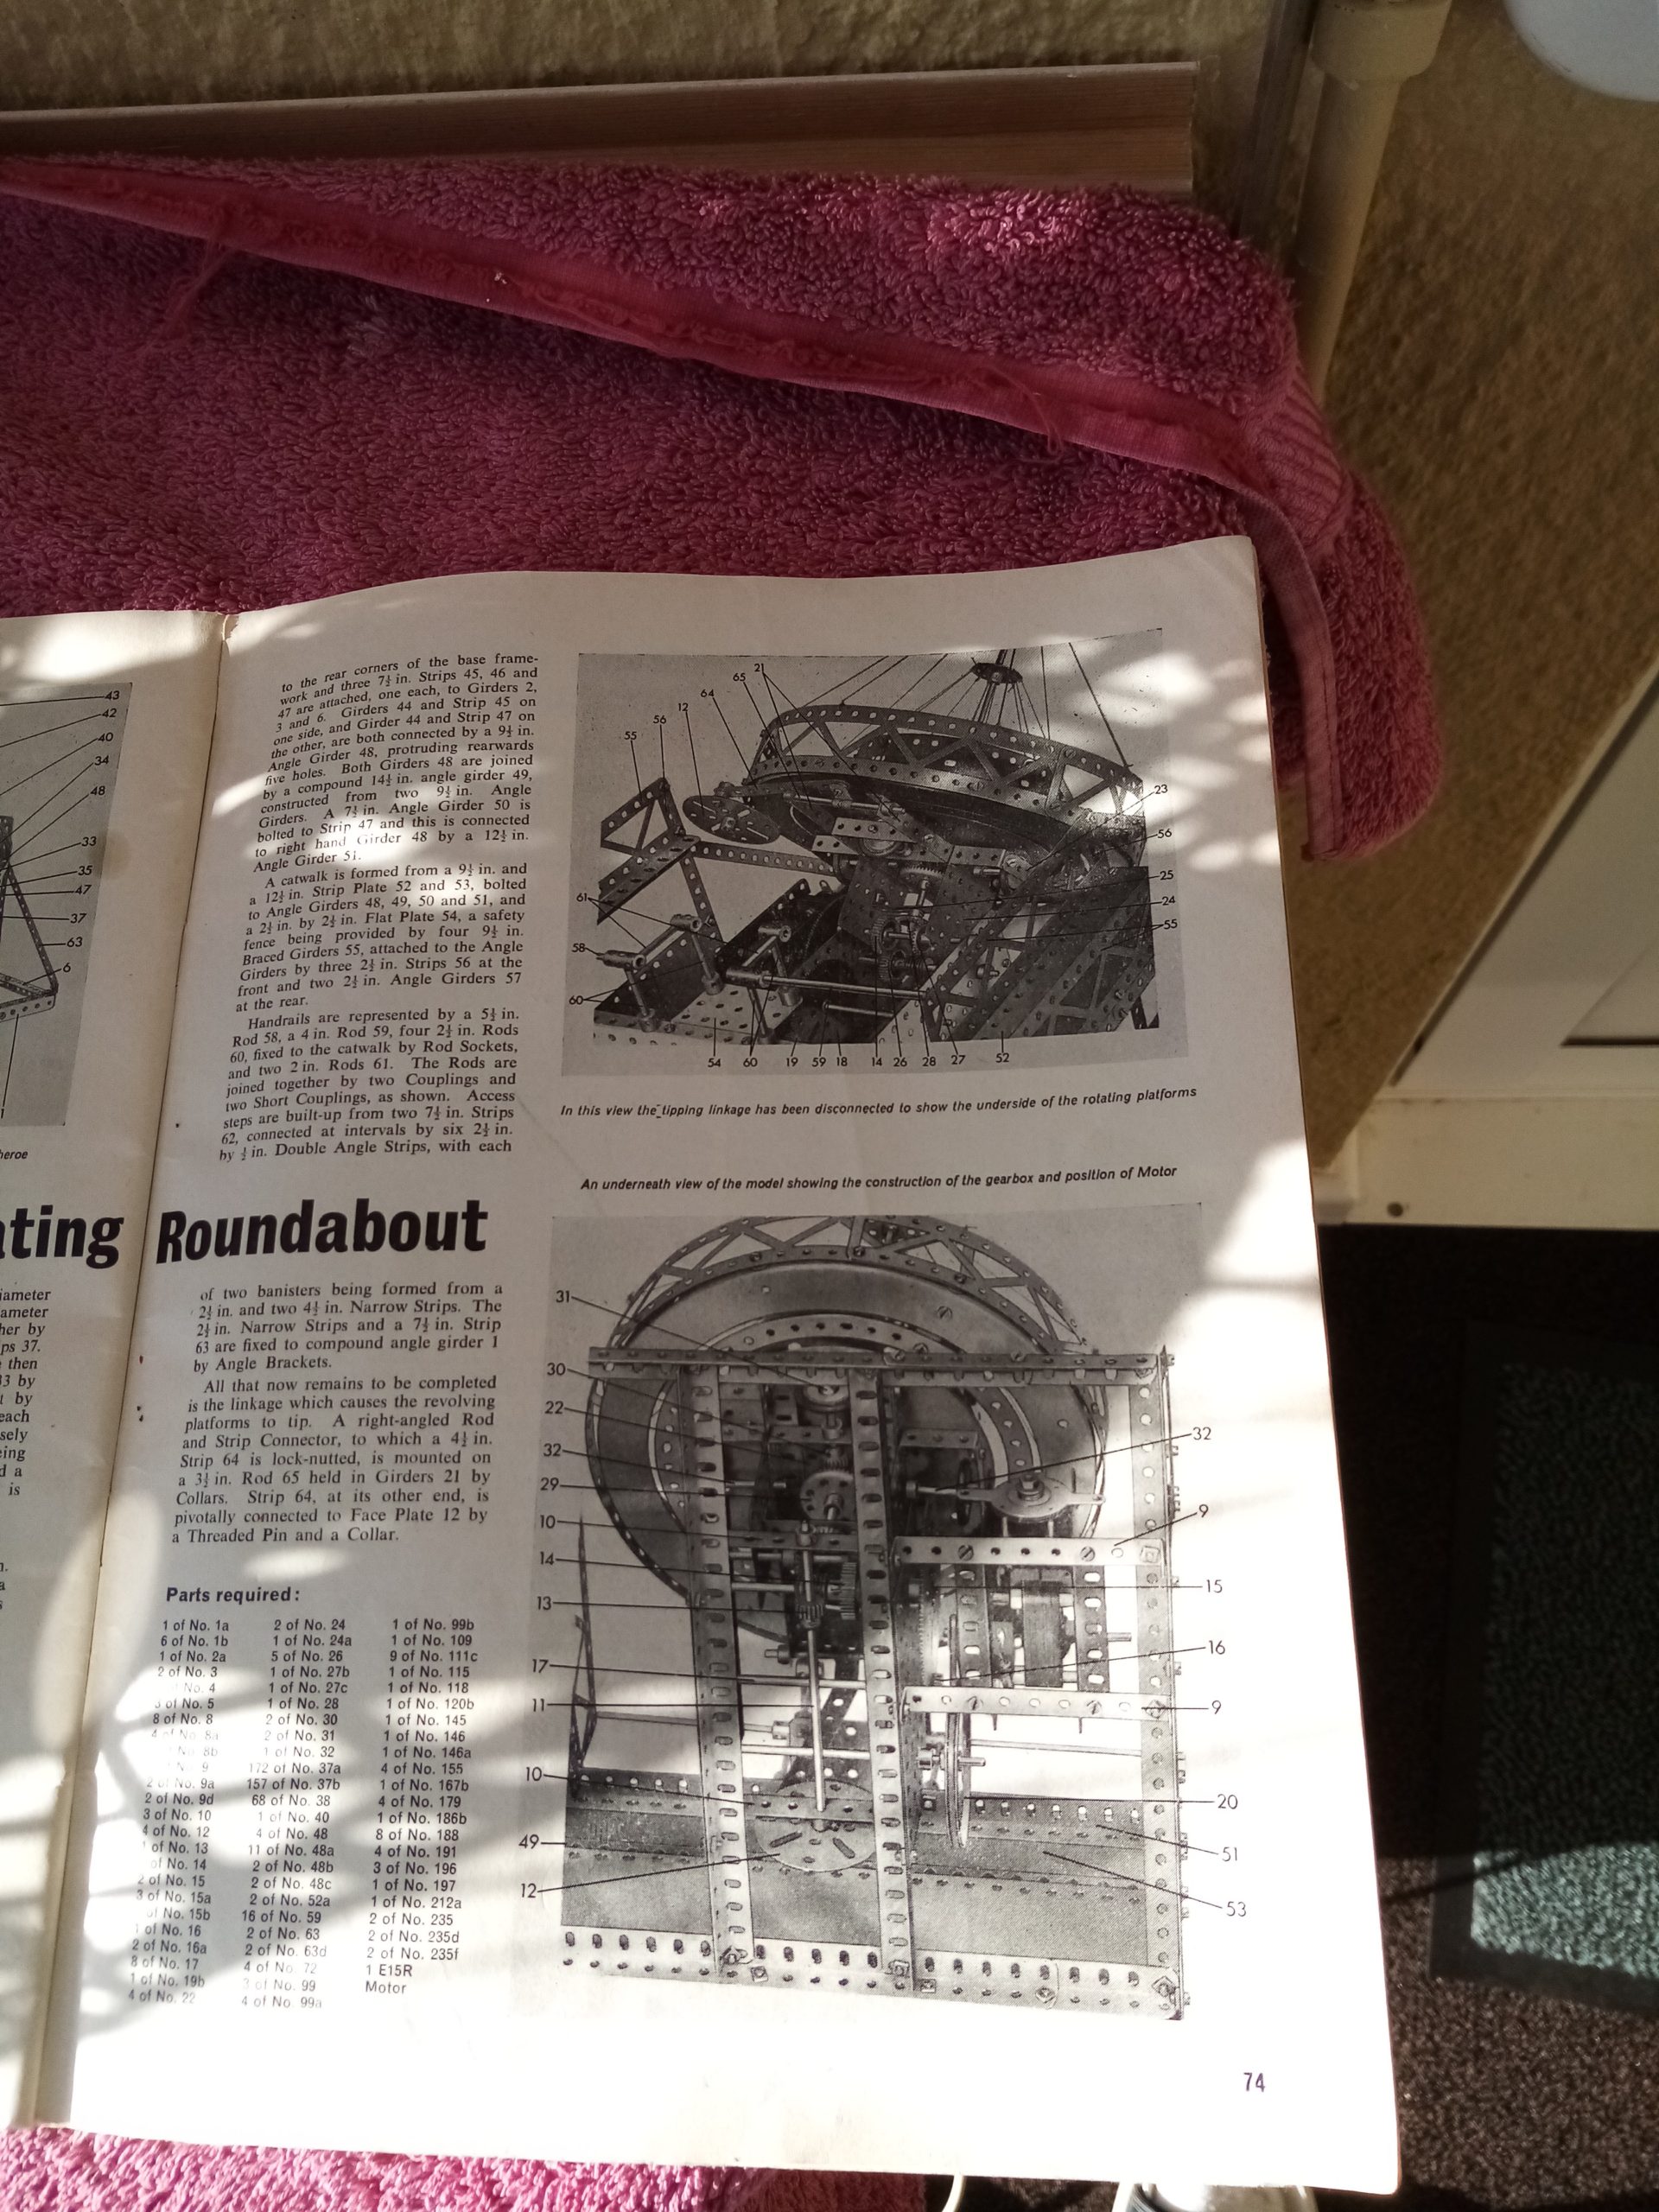
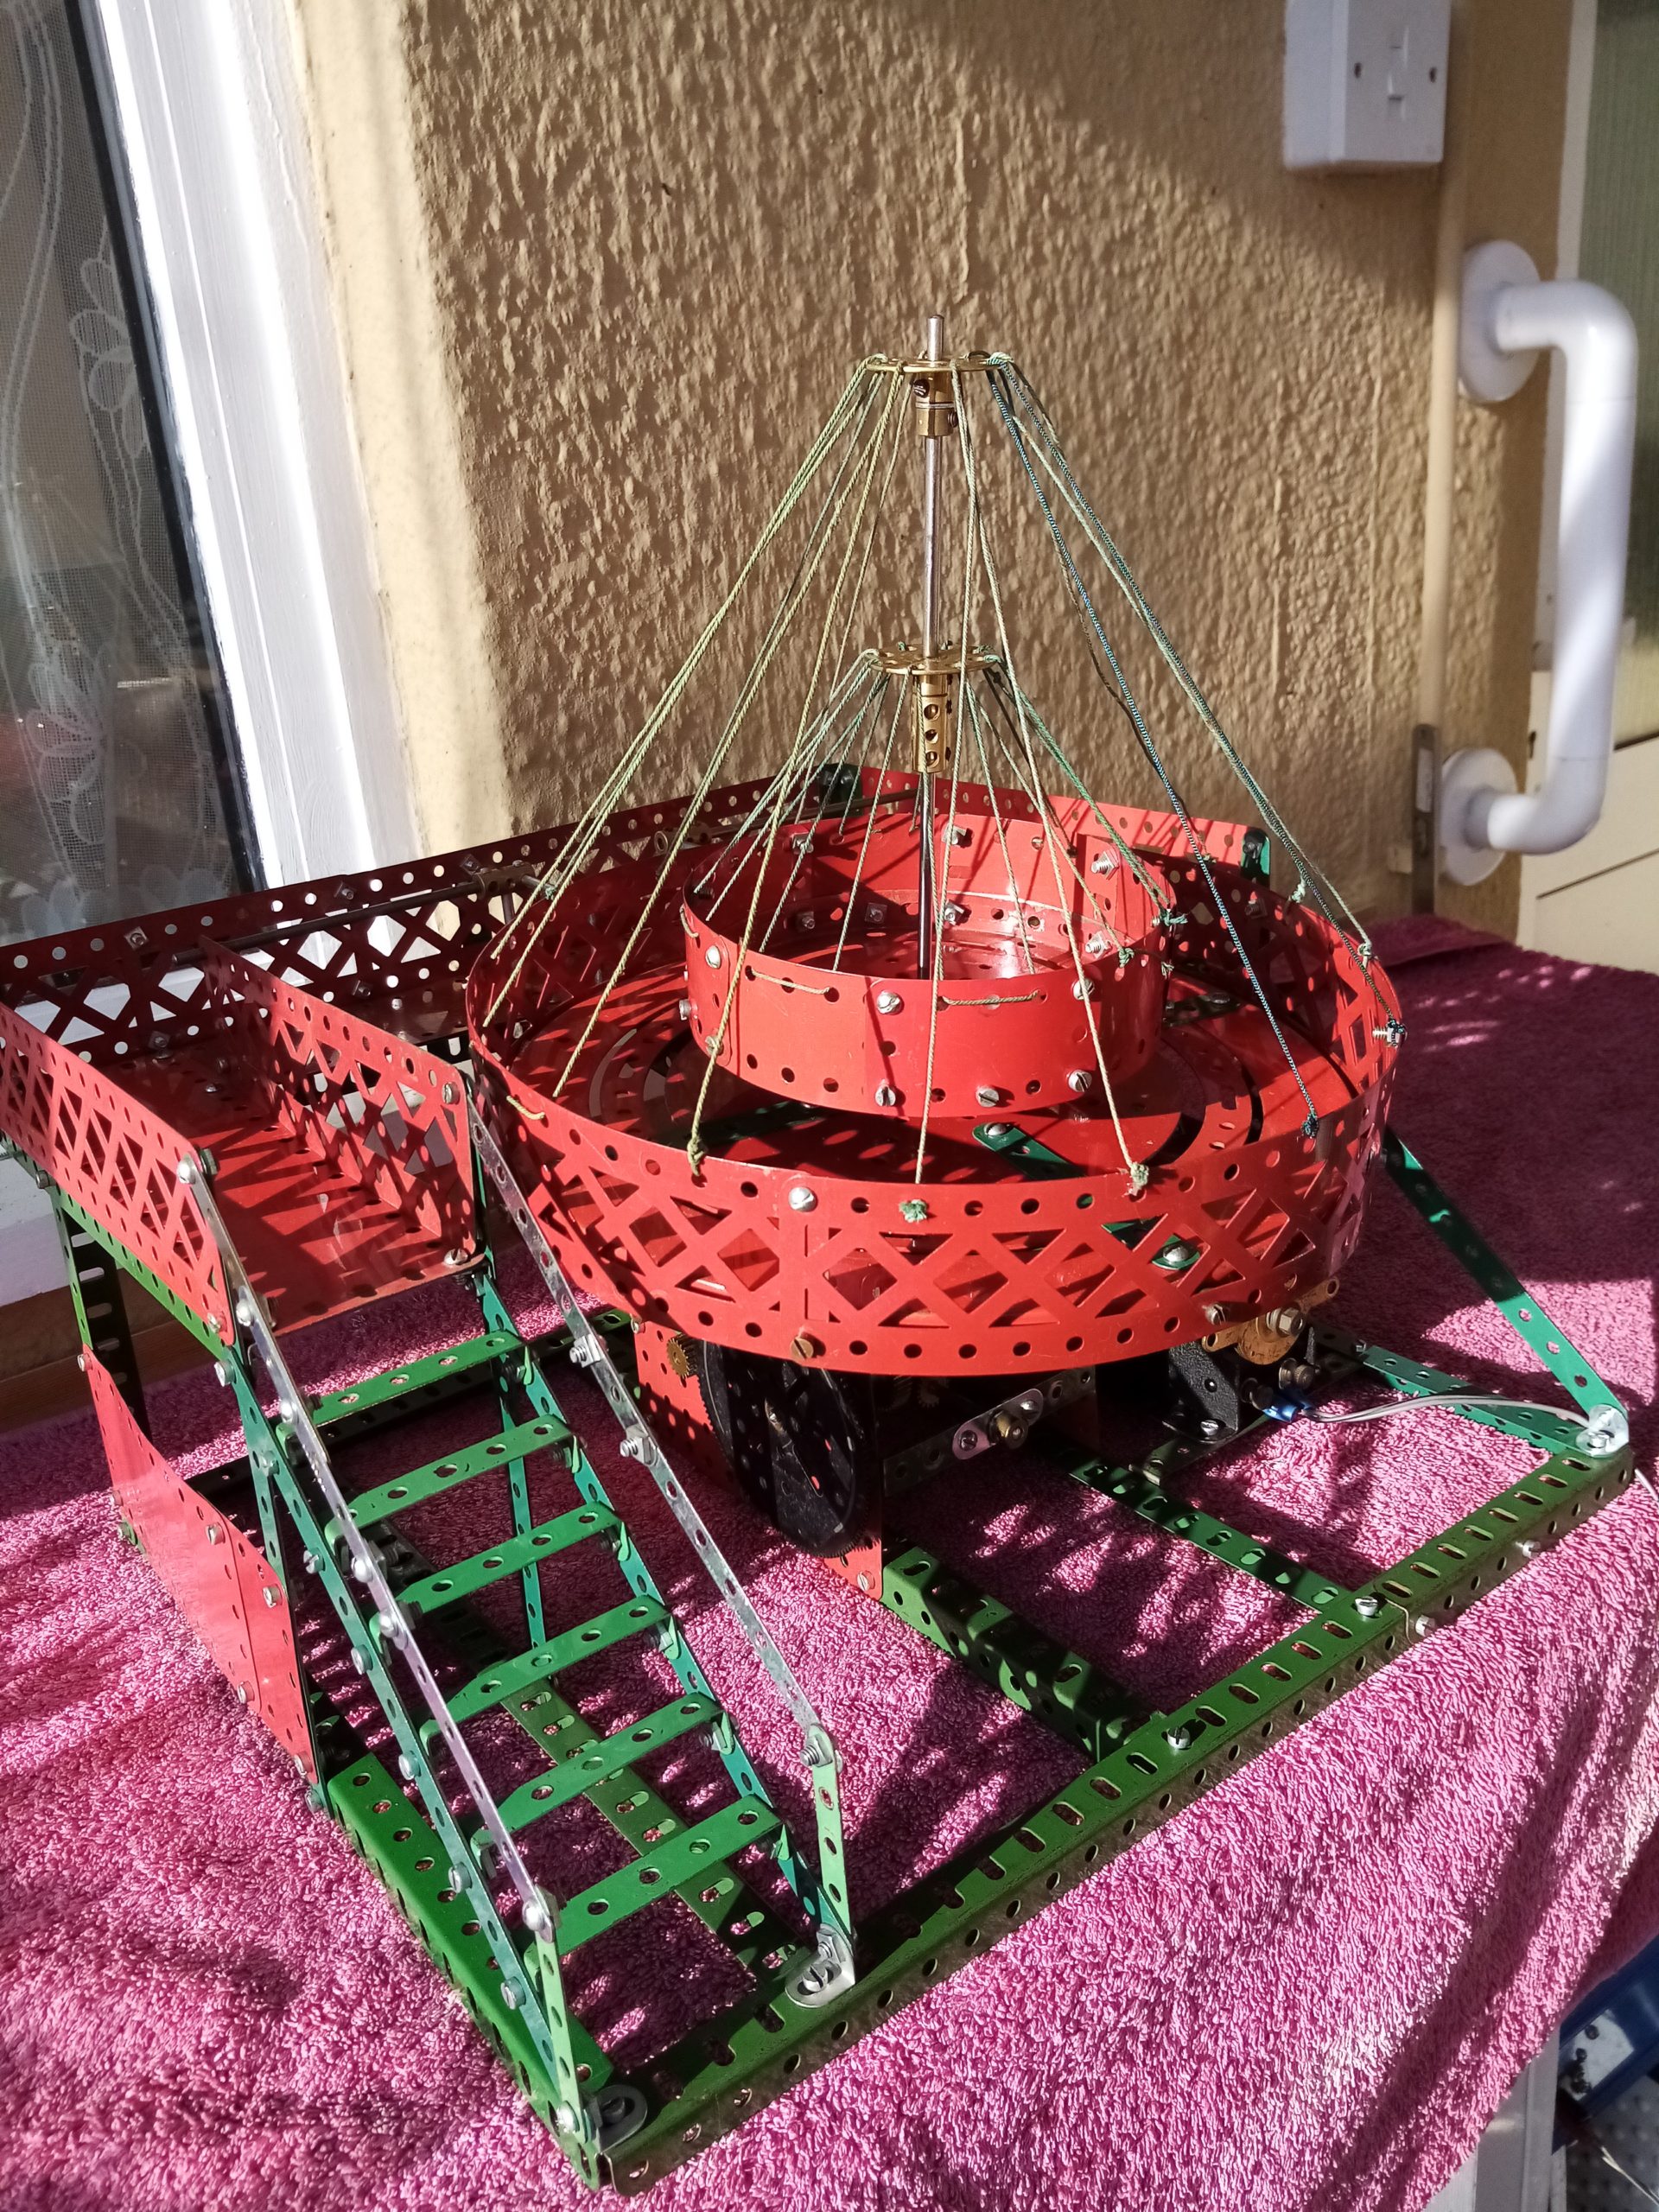
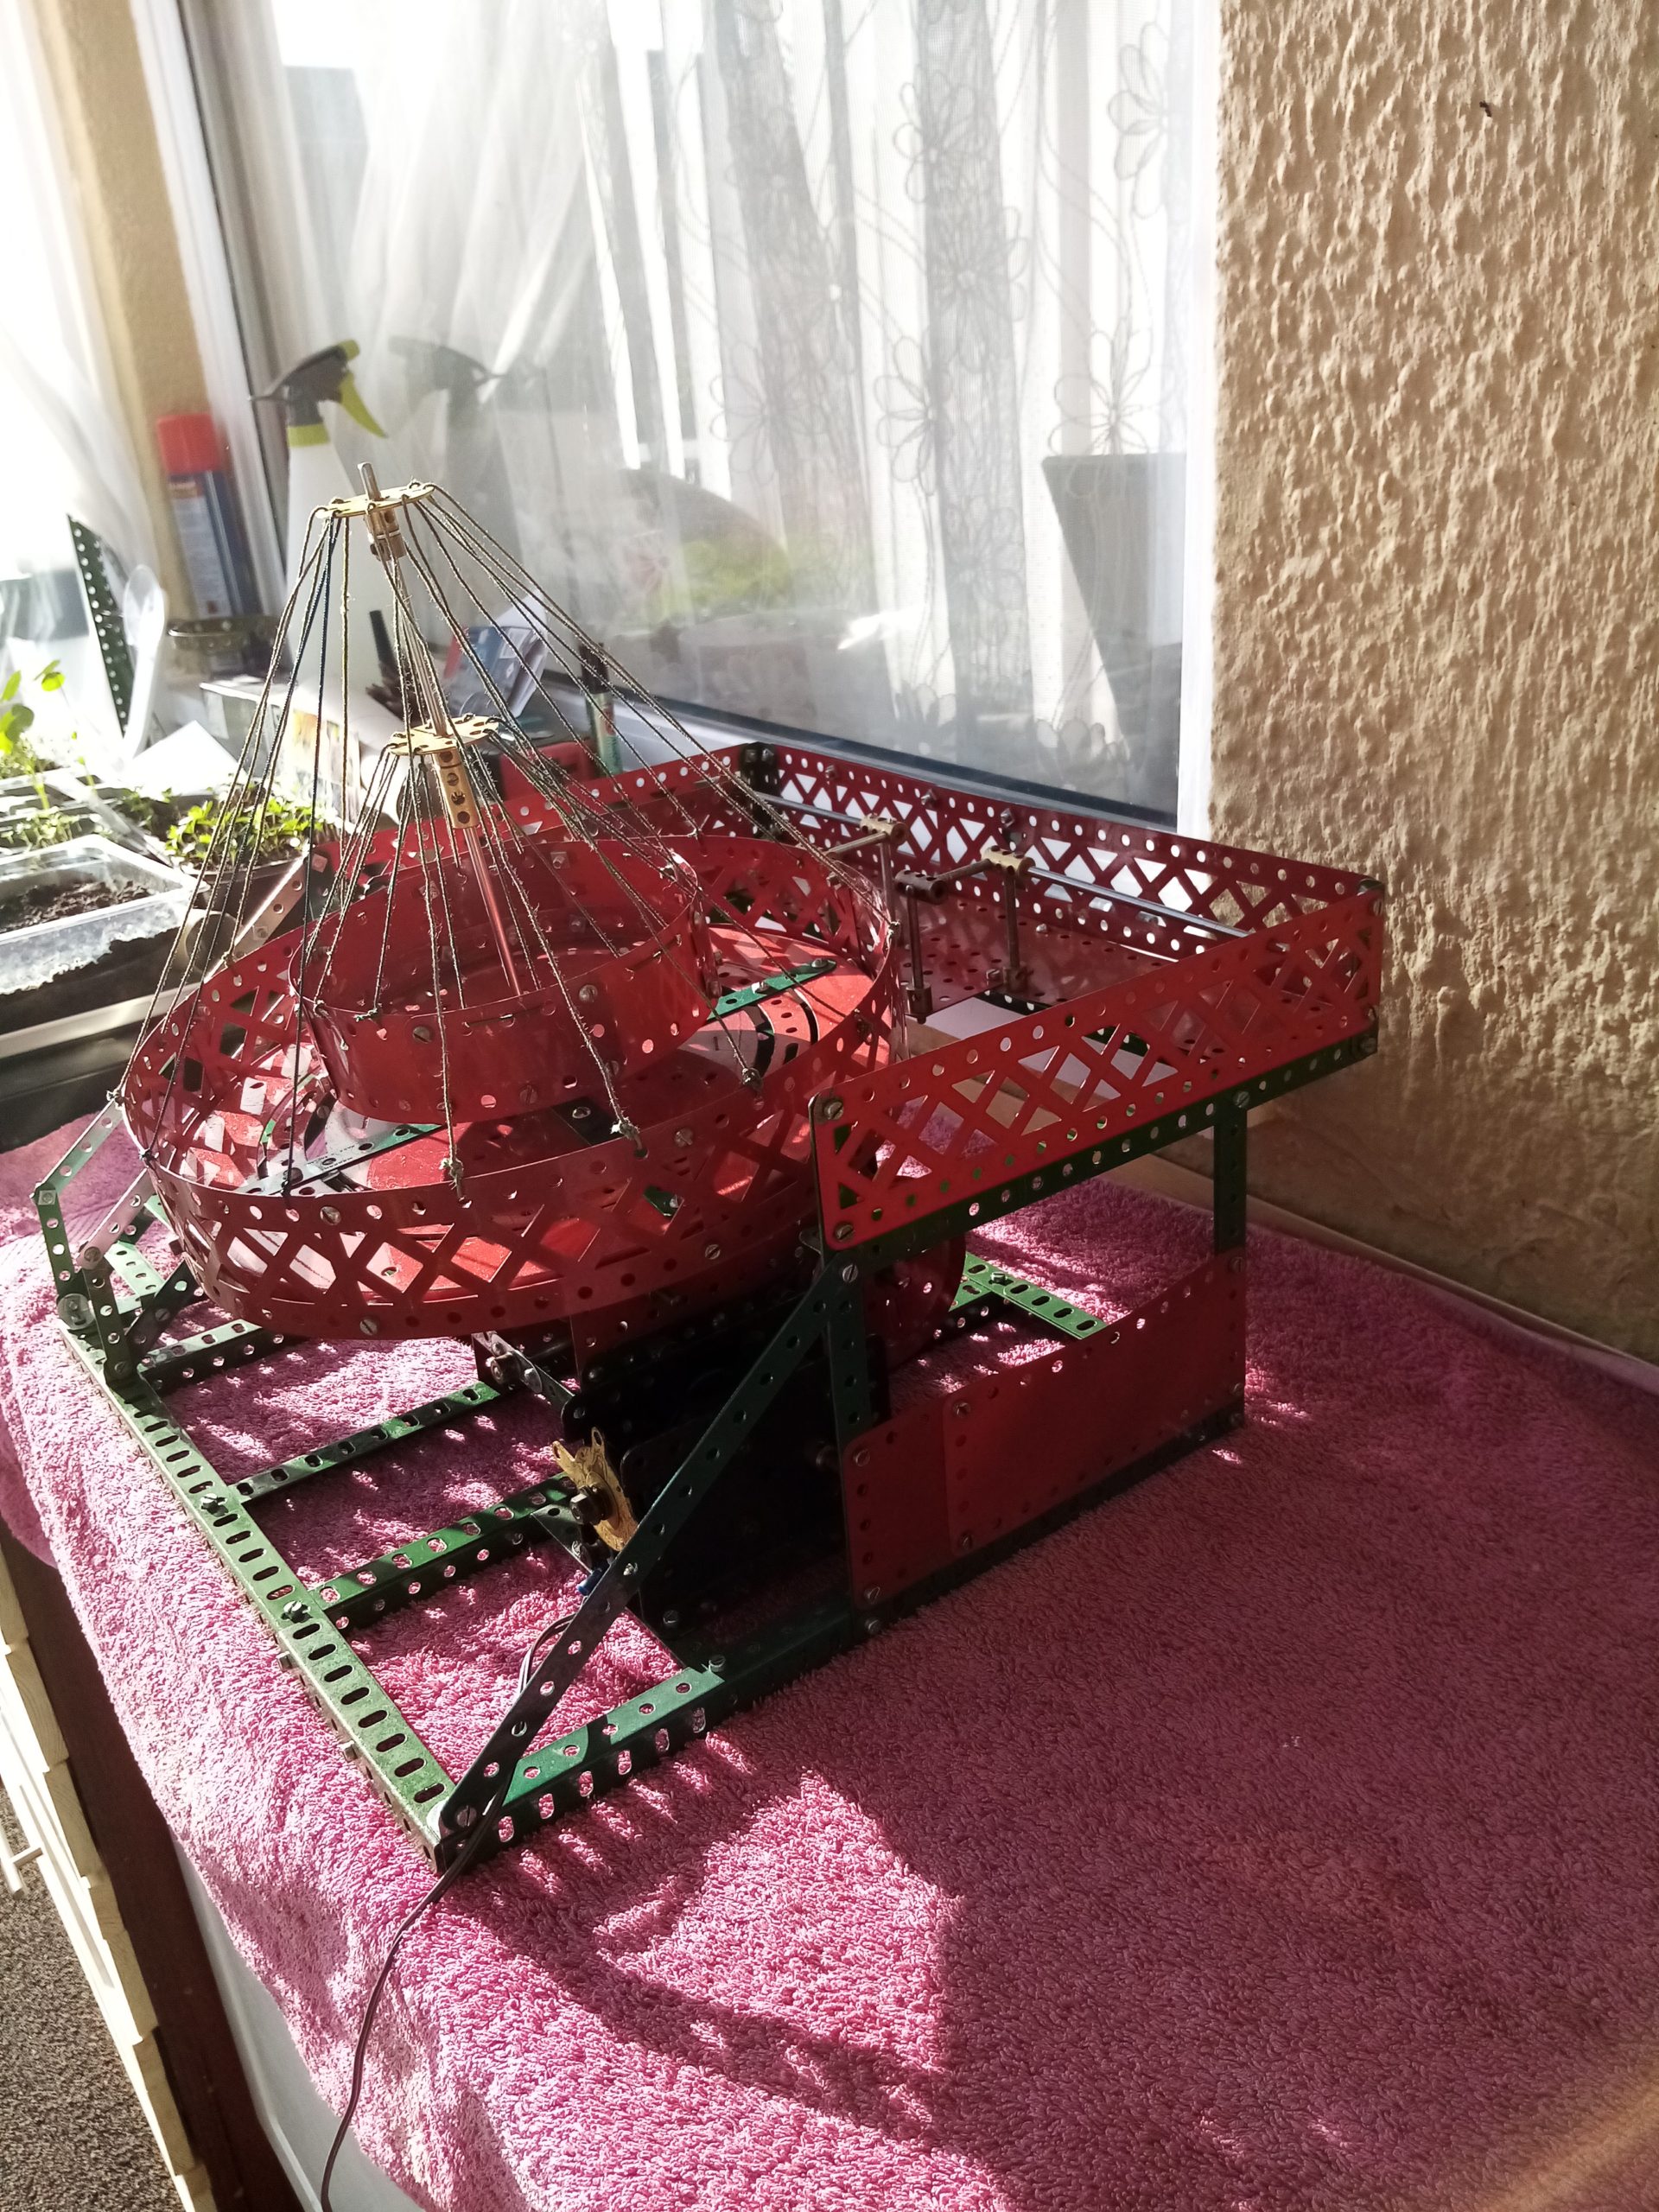
My latest model is a Contra-Rotating Roundabout from the March 1965 Meccano Magazine.
I have tried to be as true to the Instructions as possible including using the E20 Motor.
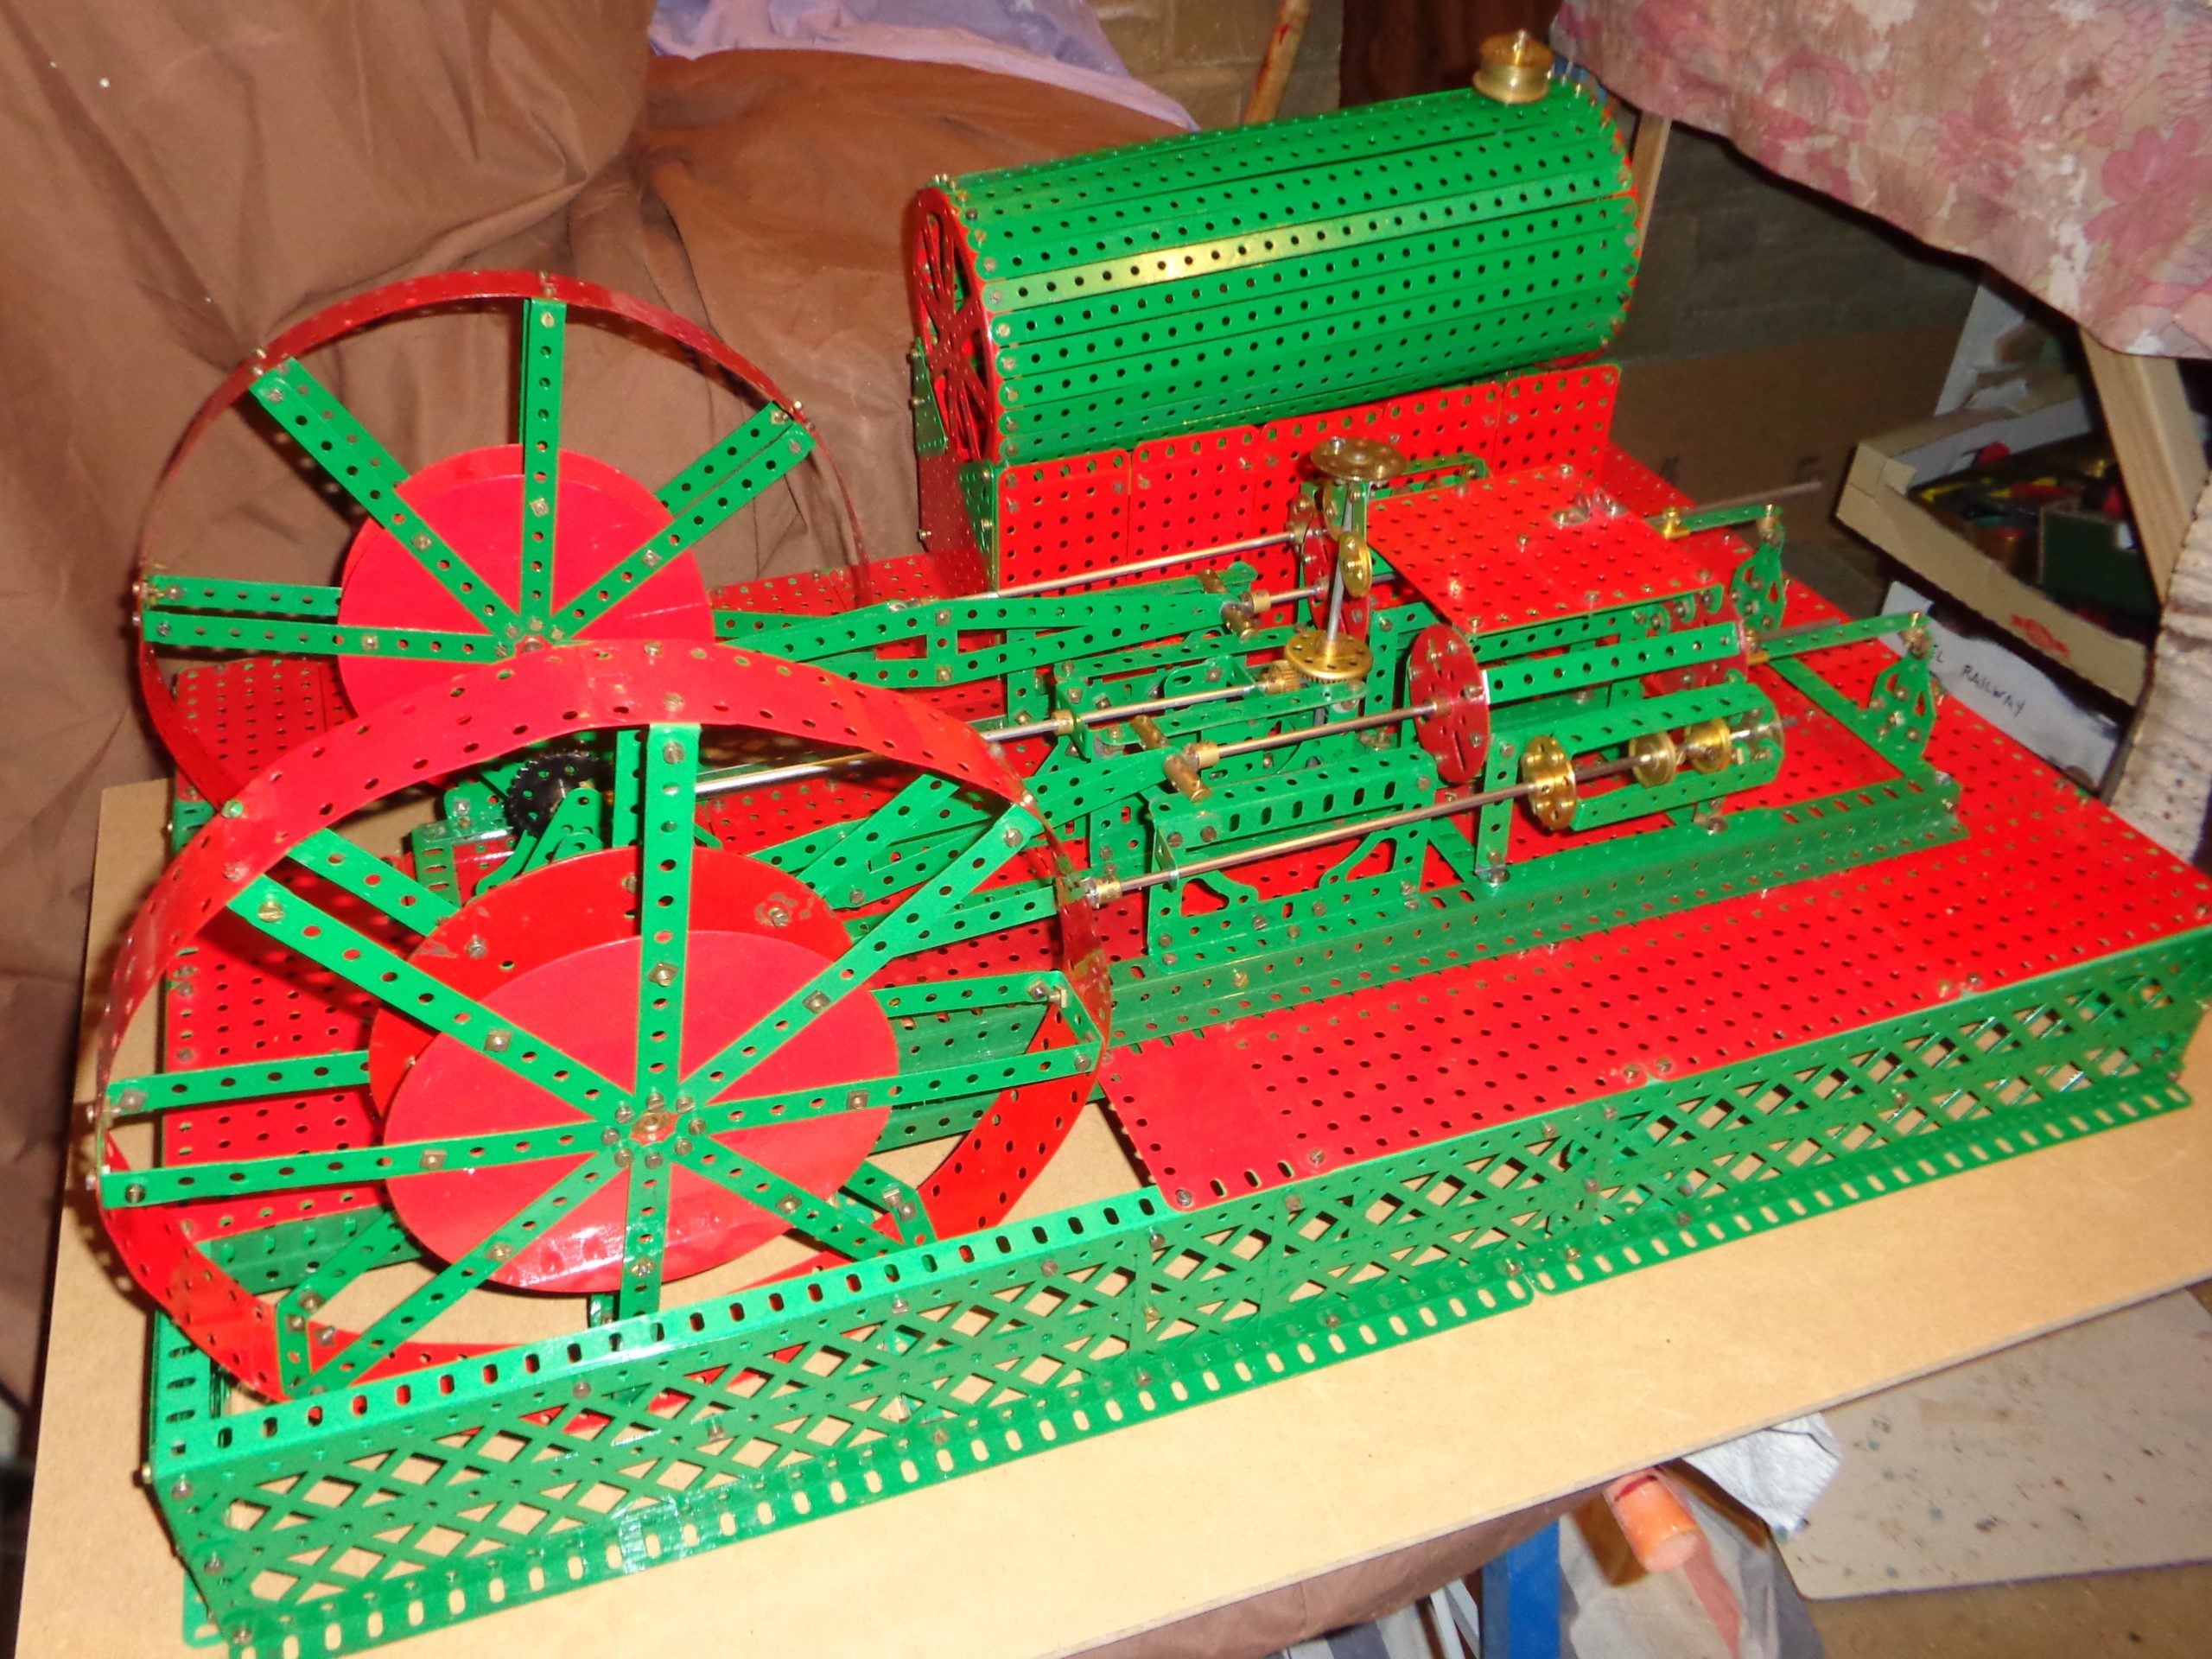
Hugh Barr: These photos are of my current model in progress. This is my attempt at Supermodel Twin Cylinder Horizontal Steam Engine SM 32 using the Meccano plans but with some modifications either to make it run better or to make it work at all. The piston valves, flywheels and boiler house are simply placed on the model for the photos. There is still a fair amount of work to be done, which I am hoping to do during Lockdown. Also where I don’t have obsolete parts e.g. on the flywheels' rims, I have used an alternative. The model sits on a board 4ft x 2ft which gives an indication of the size.
I have seen a complete model working on Youtube. Mine will not be quite as impressive but worthwhile, to me, nevertheless. I trust the perfectionists will forgive me!
I have made several large models using Meccano plans and invariably they will not work unless some alterations are made.
David Miller: This is an effort in progress for the Scrapheap Challenge (behind it are the bits of furniture I keep all my Meccano in).
So far, in about 25 shots with various alterations between them, it has achieved a wide reach of non-targets, from just 6 inches from the mouth of the barrel to so far on that it hit the sliding window behind the pot at about one foot from the ceiling. Total arrivals in the pot: 2, of which one had bounced twice on the way in, and the other bounced directly back in off the window. Judge's report: "V. poor. Must improve". Spectators' opinion: lost in giggles.
Sam Medworth
My daughter, who is studying for an MA in Library and Information Studies, discovered an interesting and little-known connection between Meccano and one of the founding fathers of library classification systems, S. R. Ranganathan. He was the father of Indian library studies, proposing the "5 laws of library science" in 1931. Whilst watching a demonstration of Meccano, he came up with a method of classifying books by facets of their contents, known as the Colon Classification, which still influences library classification and databases today.
Set 00 was produced in 1928 to make a more affordable starter set – Meccano was always relatively expensive! However with the downgrading of the sets over the years, the set with those contents was relabelled “Set 0” and in 1954 a smaller set 00 was released, with instructions for 21 models on a single folded sheet.
I made up some of the models and photographed them for my daughter's portfolio. See below:
Sam continues with his
Stothert and Pitt 7.5ton rail crane no. 312
Prototype:
Bath firm Stothert and Pitt Ltd were “cranemakers to the world” in the 19th and 20th centuries. Among others, they made the Titan blocksetting cranes used to construct harbours and breakwaters throughout the world, numerous wharfside cranes such as those in Bristol Docks, and ship-mounted cranes including those for handling seaplanes in Royal Navy ships. The Toplis level luffing system was patented by one of their engineers in 1914.
A number of the harbour cranes are still in use, such as in Guernsey and Falmouth. However, most of the smaller cranes have long since been scrapped.
When the site of the former Stothert and Pitt works was being redeveloped for housing, the developers and Bath City Council cooperated to find a suitable memorial to this important engineering firm. Fortunately, the prototype of the present model was found at Washford on the West Somerset line. It had started life in around 1904 as the S+P works crane, used in lifting heavy components of much larger cranes. In 1951 it was derailed in a spectacular accident by a runaway Bulleid Pacific engine, its driver being seriously injured. In 1971 it was donated to the Somerset and Dorset Railway Trust and was in working order until failing a boiler test in 2007. It was purchased by the developers in 2011 for £1 and brought to Bath on a low-loader at a cost of £5000, since when it has been repainted and the cab restored.
The cab has been crudely fabricated and repaired over the years – it probably started out as just a curved corrugated iron roof, if indeed there was one at all! Also, at some point the jib appears to have been extended from 25 to a rather disproportionate 45 feet. Unfortunately the original engineering drawings were lost in the bombing of Bath.
If you would like to see how it would have looked when working, this video https://www.youtube.com/watch?v=_USDavsUXXk shows the 1926 20 ton New Zealand version running on compressed air. An explanation of how such engines work is here; https://www.youtube.com/watch?v=tGQH6XioK5U and a similar engine working at Didcot here https://www.youtube.com/watch?v=MK_SYtTbEqg
The Model:
I have attempted to model it at a scale of 0.5” to the foot, in its original configuration. My aim was to demonstrate the mechanism as accurately as possible using only Meccano parts. I gained inspiration from two sources;
1. A published plan for a model of the 5 ton Grafton steam crane at Blist’s Hill by Ken Senar 2015 http://www.nzmeccano.com/image-95985
2. Peter Goddard’s excellent model of the New Zealand crane, and described in Runnymede Meccano Guild magazine 85 – article downloadable here http://www.nzmeccano.com/image-76520.
Both these were scaled at 1” to the foot and were able to incorporate the rodding and levers to effect the gear changes, impossible at my scale. I was nevertheless able to demonstrate all 4 movements driven from the main crankshaft by gears on splined axles (in Meccano, one tri-flat and one rod with keyway part 230). Unfortunately, the gears have to be changed rather crudely by the operator sliding them into position.
The small Meccano motors I tried were not powerful enough so I substituted an old cassette player motor running on 9v; slew and travel have come out well but hoist and luffing are rather too slow, so further work is needed. I also need to work on the band brake used for holding the hoist while gears are changed.
I wondered about doubling the scale to 1” to the foot, but I would then need some non-meccano parts such as a 5” diameter gear.
I learned a lot from the build and look forward to demonstrating it when we meet again.
Sam has also been looking at:
Meccano computer control in Windows
Increasingly various methods of controlling Meccano models have been tried over the years. This can be as simple as a sequence of actions, or be truly “robotic” where the model senses and responds to various conditions or actions, internal or external. In every case there must be a processor running some form of software, sensors such as switches and potentiometers to record what is happening, and an interface able to deal with the voltages and currents needed to run the model. An example used successfully by several members of the club, notably Philip Drew, is the Arduino processor which can, with suitable additions, be used to control stepper motors giving very precise positioning of, for example, a crane or robotic arm.
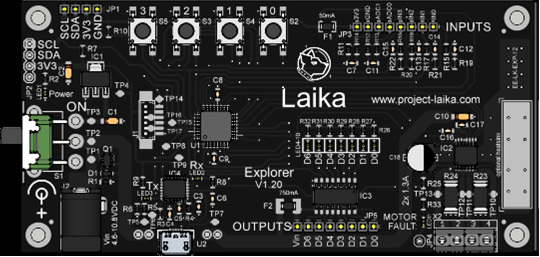
I have been investigating an interface board called Laika, available from Kitronik for a number of years, currently priced at £12. This was originally developed to run with the Raspberry Pi mini-computer using the Python language. This requires a knowledge of programming that I do not have. However, it can also be controlled from Scratch, a very simple programming technique used in primary schools which can build surprisingly sophisticated programs with a series of blocks like Lego on the screen. This can be run on the Pi if you need the computer to be small enough to be incorporated on your model, or on a Windows laptop if it can be tethered.
This is a 6x12cm high quality PCB which requires a DC input of 4.6-10.8 volts and USB connection to the computer. It can then take inputs from 2 variable resistors and 4 switches, and output current directly to 2 motors with speed control, plus 7 on/off low current switches to control relays. It can thus be connected directly to Meccano motors, Elektrikit switches and the Electronic set relay or photocell. It has 4 switches and 7 LEDs corresponding to the inputs and outputs to help with testing the setup.
Advantages:
Run from the familiar Windows operating system on a laptop; more than one can be run at once to control even more complicated models.
Motors up to 10v can be speed-controlled directly from the program, LEDs switched directly and other electrics controlled by relays – even the old 20v AC sideplate motors, or solenoids from Elektrikit coils.
Detectors can include microswitches, reed switches, light/temperature detectors/Infrared proximity detectors, position detection by potentiometer etc.
Sounds can be controlled from the program and output to a speaker within the model.
The Scratch programming system is simpler yet more flexible than anything else that I have seen.
Cheap as the price has come down!
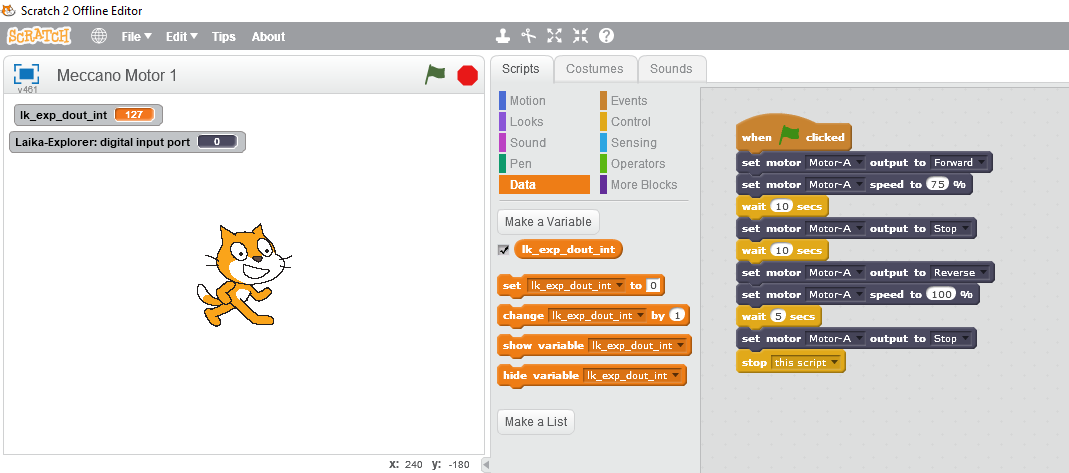
The program is on the right, and runs the motor forward at 75% max speed for 10 seconds, stops it then runs it back for 5 seconds at full speed as it might for a machine tool such as a milling machine. I tested it on an Emebo motor at 6v and it worked well. Responses to limit switches etc can then be added in.
Having at last got the system up and running, I hope to incorporate it in a model soon and demonstrate it when we next meet. If anyone would like to try out the system and needs some advice, I can be contacted through the website.
